safety first convertible car seat manual
The Safety 1st Convertible Car Seat manual provides essential guidelines for safe installation, usage, and maintenance. Designed for children from 5 to 100 pounds, it offers rear-facing, forward-facing, and booster modes, ensuring proper fit and protection. Adhering to the manual is crucial for optimal safety and functionality.
Overview of the Safety 1st Convertible Car Seat
The Safety 1st Convertible Car Seat is a versatile, all-in-one solution designed for children from 5 to 100 pounds. It accommodates rear-facing (5-40 lb), forward-facing (22-65 lb), and booster (40-100 lb) modes, adapting to a child’s growth. The seat features a built-in harness system, multiple recline positions, and LATCH installation options for secure placement. Its adjustable headrest and shoulder harness slots ensure proper fit as the child grows. Additionally, it is FAA-certified for aircraft use in certain configurations. The seat pad is removable for cleaning, and the harness system can be stored when using booster mode. This car seat combines safety, convenience, and durability, making it a practical choice for families.
Importance of Following the Manual
Adhering to the Safety 1st Convertible Car Seat manual ensures the safety and well-being of your child. Proper installation and usage prevent serious risks, such as incorrect positioning or loose fitting, which can lead to injury. The manual provides critical guidelines for weight limits, harness adjustments, and installation methods, tailored to your child’s age and size. Neglecting these instructions can compromise the seat’s protective features. Always read and follow the manual carefully to maximize safety and ensure compliance with safety standards and regulations.
Key Features of the Safety 1st Convertible Car Seat
The Safety 1st Convertible Car Seat offers versatile functionality, supporting rear-facing, forward-facing, and booster modes. It features adjustable harnesses, multiple recline positions, and LATCH installation options for secure fitment. The seat accommodates children from 5 to 100 pounds, ensuring long-term use. Its design emphasizes comfort and safety, with easy adjustments to grow with your child. Built-in features enhance protection and convenience, making it a reliable choice for parents seeking a durable and adaptable car seat solution.
Weight and Height Limits
The Safety 1st Convertible Car Seat accommodates children across various stages. Rear-facing mode supports 5-40 pounds (2.3-18 kg) and 19-40 inches (48-101.6 cm). Forward-facing mode is designed for 22-65 pounds (10.1-29 kg) and 29-49 inches (73.6-125 cm), with a minimum age of 2 years. The booster mode suits children from 40-100 pounds (18.1-45.4 kg) and 43-52 inches (110.1-132.1 cm), with a minimum age of 4 years. These limits ensure proper fit and safety, so verifying your child’s measurements before use is essential for optimal protection.
Recline Positions and Adjustability
The Safety 1st Convertible Car Seat features three recline positions, ensuring comfort and proper positioning for your child. Rear-facing mode requires the level line on the shell to be parallel with the ground for infants who cannot sit up unassisted. For forward-facing and booster modes, the seat can be adjusted to provide optimal support. The manual guides adjusting the recline handle and ensuring the seat fits snugly against the vehicle seat. Proper recline positioning is critical for safety, especially in rear-facing installations, to prevent the child’s head from tilting excessively.
LATCH and Vehicle Belt Installation Options
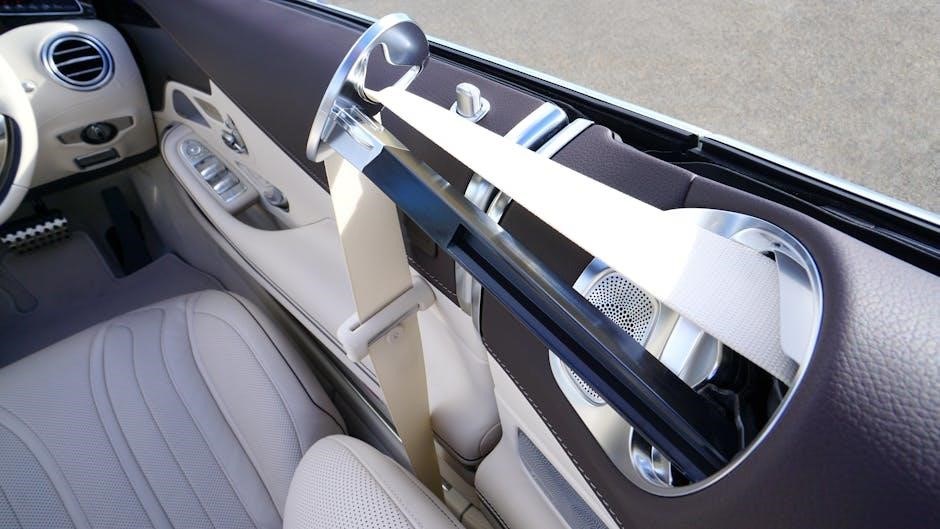
The Safety 1st Convertible Car Seat offers flexible installation methods using either LATCH or vehicle belts for secure placement. LATCH (Lower Anchors and Tethers for Children) provides a universal system for rear-facing and forward-facing setups, eliminating the need for seat belts. Vehicle belts are an alternative, especially when LATCH anchors are unavailable. Both methods ensure a tight fit, with guidelines advising against twisted belts and emphasizing proper belt routing through designated paths. The manual details steps for each method, ensuring safety and ease of installation in various vehicles;
Built-In Harness System
The Safety 1st Convertible Car Seat features a built-in harness system designed to provide optimal protection and comfort. The system includes padded shoulder straps, a chest clip, and a buckle, ensuring proper positioning across the child’s body. The harness is adjustable, with slots to accommodate growing children, and can be tightened securely to prevent excessive movement. The manual emphasizes the importance of correct harness fit, with guidelines for proper chest clip placement and strap tension. Regular adjustments are recommended to maintain safety as the child grows, ensuring the harness continues to provide effective protection in various seating positions.
Understanding the Parts of the Car Seat
Familiarizing yourself with the car seat’s components, such as the headrest, harness, chest clip, and LATCH system, is crucial for proper assembly and safe usage.
Headrest and Harness System
The headrest and harness system are vital for your child’s safety. The headrest adjusts to fit your child’s height, while the harness ensures proper positioning. Always ensure the harness straps are snug and the chest clip is at armpit level. For smaller infants, use the lower shoulder harness slots and the provided body pillow for added support. Adjust the headrest to the lowest position when using these features. Regularly check that the harness is secure and the headrest is correctly aligned to provide optimal protection during travel.
Chest Clip and Buckle
The chest clip and buckle are essential components of the Safety 1st Convertible Car Seat. The chest clip must be positioned at mid-chest level, aligned with your child’s armpits, to ensure proper restraint. The buckle secures the harness straps and should be easy to fasten and unfasten. Always thread the harness straps correctly through the slots in the headrest and seat back. After securing your child, tighten the straps until snug and check the chest clip placement for safety. Proper alignment prevents misuse and enhances protection during travel. Regularly inspect these parts for damage or wear.
LATCH Attachment and Tether
The LATCH (Lower Anchors and Tethers for Children) system simplifies secure installation without vehicle belts. Attach the LATCH connectors to your vehicle’s anchors, ensuring a snug fit. For forward-facing use, the tether adds stability by connecting the car seat’s top to the vehicle’s tether anchor. Tighten the tether until the car seat moves less than one inch side to side. Proper use of LATCH and tether ensures a safe, stable installation, reducing the risk of movement and enhancing your child’s protection while traveling.
Seat Pad and Adjusters
The seat pad and adjusters ensure a comfortable, secure fit for your child. The pad is removable for cleaning, while the adjusters allow customization of the seat’s position. Loosen harness straps by pushing the release lever, then pull out the straps to fit your child. The headrest adjusts to match your child’s height, ensuring proper support. Correctly fitting the seat pad and adjusting the harness system are vital for safety and comfort, providing optimal protection and ease of use as your child grows. Always refer to the manual for detailed guidance on adjustments.

Preparing the Car Seat for Your Child
Loosen harness straps, adjust the buckle position, and fit the headrest to your child’s height for a secure and comfortable fit, ensuring proper safety and support.
Loosening the Harness Straps
To loosen the harness straps, press down on the harness release lever located under the front flap of the seat pad. While holding the lever, gently pull the straps outward to desired length. Ensure the straps are not twisted and lie flat against your child’s body for proper fit and safety. This step is essential before placing your child in the seat to guarantee comfort and correct positioning. Always refer to the manual for specific guidance on adjusting the harness system effectively.
Adjusting the Buckle Position
Adjust the buckle position by threading the harness straps through the appropriate shoulder slots to ensure the chest clip sits at mid-chest level. For rear-facing, the buckle tongues should be at or below the child’s hips. In forward-facing mode, they should be at or above the shoulders. Proper positioning ensures the harness system functions correctly. Always check the manual for specific slot locations and guidelines to ensure optimal safety and comfort for your child. This adjustment is critical for effective crash protection and proper fit.
Fitting the Headrest to Your Child’s Height
To ensure proper fit, adjust the headrest to align with your child’s shoulders. Loosen the harness straps and move the headrest up or down until it is level with your child’s shoulders. Thread the harness straps through the designated slots in the headrest pad. The chest clip should sit at mid-chest level, even with your child’s armpits. Proper headrest positioning ensures optimal support and protection. Always refer to the manual for specific guidance on adjusting the headrest for your child’s height and weight range to guarantee safety and comfort.
Installation Methods
The Safety 1st Convertible Car Seat offers two installation options: LATCH and vehicle belt. Both methods ensure secure placement when done correctly. Always follow the manual’s guidelines to avoid errors and ensure a tight, proper fit for your child’s safety.
LATCH Installation
Attach LATCH connectors to vehicle anchors, ensuring correct routing through designated belt paths. For rear-facing, position level line parallel to ground if child cannot sit unassisted. Tighten LATCH belt until secure, checking movement with one inch or less. Ensure no twisting or slack. For forward-facing, use tether for added stability. Follow manual for proper belt positioning and vehicle compatibility. Always verify tightness by pulling side-to-side. LATCH installation is not suitable for booster seat mode. Consult vehicle manual for anchor locations and ensure correct usage for your child’s safety.
Vehicle Belt Installation
Position the car seat in the vehicle and route the lap or lap/shoulder belt through the designated belt path. For rear-facing, ensure the level line is parallel to the ground if the child cannot sit upright. Firmly push the seat into the vehicle while tightening the belt, removing slack. Check for movement by pulling side-to-side; it should not exceed one inch. For forward-facing, use the tether for additional stability. Ensure the belt is snug and not twisted. Follow the manual for correct routing and vehicle compatibility. Never use ELR lap-only belts with this car seat for safety reasons.
Using the Tether for Forward-Facing
When using the Safety 1st Convertible Car Seat in the forward-facing position, the tether strap enhances stability and safety. Locate the tether anchor point in your vehicle, typically behind or below the rear seat. Attach the tether hook to this anchor, ensuring it is securely fastened. Route the tether strap through the designated slot on the car seat’s back. Tighten the tether by pulling firmly until it is snug and not twisted. This step minimizes forward movement during sudden stops. Always refer to your vehicle’s manual for anchor locations and ensure the tether is correctly installed for optimal protection.

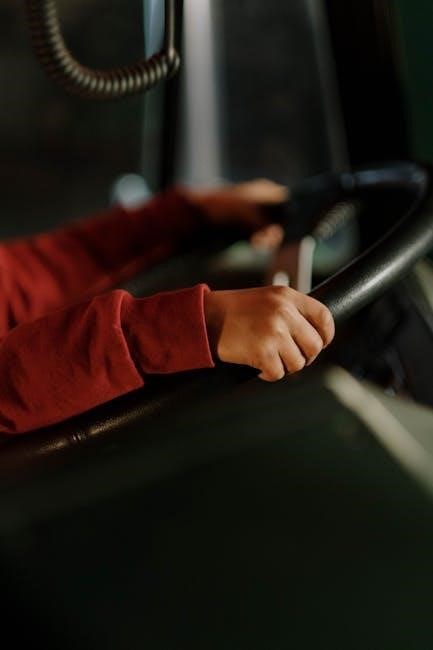
Securing Your Child
Place the child in the seat, ensuring proper posture. Thread harness straps through slots, position the chest clip mid-chest, and tighten the harness for a snug fit.
Placing the Child in the Seat
Position the child in the car seat, ensuring their bottom and back are flat against the shell. For rear-facing, the level line on the shell must be parallel to the ground. For forward-facing, the child must be at least 2 years old. Ensure the child’s shoulders are aligned with the seat’s shoulder marks. The harness straps should pass through the correct shoulder slots based on the child’s height. The chest clip should be at mid-chest level, even with the armpits, and the buckle should be snug but not overly tight. Proper positioning ensures optimal safety and comfort.
Threading the Harness Straps
Before securing your child, ensure the harness straps are correctly threaded through the headrest and shoulder slots. For rear-facing, use the lower slots, and for forward-facing, use the higher slots aligned with your child’s shoulders. Avoid twisting the straps and ensure they lie flat against your child’s chest. The buckle tongues should be inserted into the correct slots, and the chest clip must be at armpit level. Proper threading ensures the harness fits snugly, providing the best protection in the event of sudden stops or impacts. Always refer to the manual for precise slot positioning based on your child’s height and weight.
Tightening the Harness
After properly threading the harness straps, pull the shoulder belts to tighten them evenly. Ensure the straps are snug but not overly restrictive. The chest clip should sit at mid-chest level, aligned with your child’s armpits. To tighten, pull the harness adjustment strap located at the bottom of the seat. Check that the harness passes the pinch test: you should not be able to pinch any slack between your fingers. Proper tightening ensures your child is securely restrained, reducing the risk of injury. Always verify that the harness is neither too loose nor too tight for your child’s comfort and safety.
Adjusting the Harness System
Adjust the headrest to match your child’s height. Ensure shoulder straps are at or below shoulder level. Position the chest clip mid-chest for optimal safety and comfort.
Headrest Adjustment
To adjust the headrest, first loosen the harness straps by pressing the release lever located under the front flap of the seat pad. Gently pull the headrest upward or downward to match your child’s height. Ensure the headrest is level with your child’s ears for rear-facing and at or below for forward-facing. Proper alignment ensures the harness system functions correctly, providing optimal protection. Always refer to the manual for specific guidance to avoid incorrect adjustments. Correct headrest positioning is vital for your child’s safety and comfort during travel.
Shoulder Harness Slots
Adjust the shoulder harness slots to ensure proper fit for your child. Place the harness straps at or slightly below your child’s shoulders for rear-facing and at or slightly above for forward-facing. To adjust, loosen the harness straps and slide the shoulder pads up or down. Ensure the harness system is snug, with no twists, to provide maximum protection. Proper shoulder harness slot alignment is essential for distributing forces safely in the event of sudden stops or impacts. Always refer to the manual for specific guidance to ensure correct positioning. Correct harness slot placement enhances safety and comfort.
Chest Clip Placement
Position the chest clip at mid-chest level, even with your child’s armpits, ensuring it sits snugly against their body. Avoid placing it too high, near the neck, or too low, below the armpits, as this could compromise safety. The chest clip helps distribute forces during sudden stops or impacts. Proper placement ensures your child remains secure and comfortable. Always verify the chest clip’s position after securing your child and adjust as needed. Incorrect placement can lead to discomfort or safety risks. Follow the manual’s guidelines for accurate chest clip alignment to maximize protection and comfort during travel.
Maintenance and Cleaning
Regularly clean the car seat by removing the seat pad and washing it with mild soap. Store the harness system when converting to a booster. Always follow manual guidelines for proper cleaning and storage to ensure longevity and safety.
Removing the Seat Pad
To remove the seat pad, first unbuckle the harness and loosen the straps. Pull the pad from the bottom of the seat, working your way around the edges. Ensure all straps remain threaded through their slots. Avoid force, as rough handling can damage the seat or harness system. Once removed, clean the pad with mild detergent and allow it to air dry before reattaching. Never remove the harness system when taking off the seat pad, as this can compromise the seat’s structural integrity and safety features.
Cleaning the Harness System
Clean the harness system regularly with a soft cloth and mild detergent. Avoid harsh chemicals or submerging any parts in water. Gently scrub away dirt or stains, ensuring no residue remains. Allow all components to air dry completely before reassembly or use. Never bleach or iron the harness straps, as this can weaken the material. Regular cleaning ensures optimal functionality and your child’s safety while maintaining the integrity of the harness system.
Storing the Car Seat
When storing the Safety 1st Convertible Car Seat, ensure it is clean and dry. Remove the seat pad and harness system, and store them separately in a cool, dry place. Avoid exposing the seat to extreme temperatures or moisture. Do not store the car seat in the attic, basement, or areas prone to pests. Always check the expiration date before reusing the seat. If storing for an extended period, consult the manual for specific instructions to maintain its integrity and safety features. Proper storage ensures the car seat remains in good condition for future use.

Troubleshooting Common Issues
Address loose installations, harsh harness straps, and recline position problems by consulting the manual for solutions. Ensure proper tightening, adjustment, and alignment for optimal safety and comfort.
Loose Installation
A loose car seat installation can compromise safety. Check for proper LATCH or vehicle belt routing, ensuring no twisting. Tighten the seat belt or LATCH strap until firm. Use the built-in level line to confirm correct positioning. If the seat moves more than 1 inch side-to-side, reinstall it. Ensure the child restraint is snug against the vehicle seat. Refer to the manual for specific guidance. Always test the installation by tugging firmly at the seat. A secure fit is essential for optimal protection in the event of sudden stops or collisions.
Harsh Harness Straps
If the harness straps feel too tight or cause discomfort, adjust the shoulder harness slots to a higher position. Loosen the straps by pressing the release lever and pulling the harness outward. Ensure the chest clip is at armpit level. For smaller infants, use the lower slots and included body pillow for a snug fit. Avoid overtightening, as this can cause strain. Regularly check the straps for proper fit, ensuring the child’s movement is restricted but not constricted. Proper harness adjustment is vital for both comfort and safety, preventing potential injury during travel.
Recline Position Problems
If the recline position is not adjusting properly, ensure the recline handle is fully engaged. For rear-facing, the level line must be parallel to the ground. For forward-facing, the seat base should be flat; If the recline mechanism feels stuck, clean it gently and lubricate if necessary. Avoid forcing it, as this could damage the seat. Always refer to the manual for correct recline positions based on your child’s age and weight. Proper recline alignment is crucial for safety and comfort during travel. If issues persist, contact Safety 1st customer support for assistance.

Aircraft Use Information
The Safety 1st Convertible Car Seat is certified for aircraft use in rear-facing mode, weighing between 5-40 pounds. Ensure it’s placed in a forward-facing seat with a lap belt only, avoiding aisle blockage. Check airline policies beforehand, as some require certification labels. Use the internal harness and follow FAA guidelines for secure installation. Always consult both the car seat manual and airline instructions for compliance. Proper use ensures your child’s safety during flights.
Certification for Air Travel
The Safety 1st Convertible Car Seat is certified for aircraft use in rear-facing mode, accommodating children from 5 to 40 pounds and 19 to 40 inches tall. This certification ensures compliance with Federal Aviation Administration (FAA) standards, making it safe for in-flight use. The seat must be placed in a forward-facing aircraft seat with a lap belt, and the internal harness should be used. Some airlines may request verification of certification, so it’s advisable to carry the manual or certification label. Proper installation and adherence to airline policies are essential for safe travel with your child.
Installation in an Aircraft Seat
When installing the Safety 1st Convertible Car Seat on an aircraft, position it in a forward-facing seat with a lap belt. Ensure the seat is securely placed against the aircraft seat back and avoid blocking aisles. Use the internal harness to secure your child, following the FAA guidelines. If the lap belt is too short, request a belt extender from the flight attendant. Do not use the tether strap during flight, as aircraft seats lack shoulder belts. Always check with the airline for specific policies and ensure the seat is properly fitted before takeoff.
Special Considerations for Flying
When using the Safety 1st Convertible Car Seat on an aircraft, note that it is only certified for forward-facing installation with the internal harness. Booster mode is not allowed, as aircraft seats lack shoulder belts. Ensure the seat fits snugly against the aircraft seatback and does not obstruct aisles. Consult with your airline for their specific policies, as some may require proof of certification. Always follow FAA guidelines and request a seat belt extender if needed. Proper installation ensures a safe and comfortable flight for your child.
The Safety 1st Convertible Car Seat ensures your child’s safety through proper installation and maintenance. Always follow guidelines to adapt to their growth, ensuring ongoing protection.
Final Safety Checks
Always perform final safety checks before each use. Ensure the car seat is securely installed, with no movement exceeding 1 inch. Verify the harness is snug, with the chest clip at armpit level, and all buckles are tightly fastened. Check the seat’s position, ensuring it meets vehicle and child height/weight requirements. For rear-facing seats, confirm the level indicator is parallel to the ground. Review aircraft-specific guidelines if flying. Regularly inspect for wear or damage, and store the seat correctly when not in use to maintain its integrity and safety features. Follow all manual instructions diligently to ensure your child’s protection.
Ensuring Ongoing Safety
Regular maintenance is vital for ongoing safety. Check the car seat for any signs of wear, damage, or expiration, adhering to the manual’s guidelines. Ensure all parts, such as the harness and LATCH system, function properly. Stay informed about recalls and updates from the manufacturer. Replace the seat immediately if it has been in an accident or shows structural damage. Always follow the recommended cleaning procedures to avoid compromising safety features. By prioritizing these steps, you ensure your child’s car seat remains a reliable protection system for years to come, providing peace of mind during every journey.